Introduction
There is certainly no shortage of toxins in the world, and it seems that new ones are being discovered all the time. When it comes down to it, there are a lot of things in the environment that can kill or damage our bodies. Thankfully, we are here to give you the information you need in order to avoid them.
What Makes A Finish Food Safe?
This term is pretty self-explanatory, as its meaning is literal. When something is “food safe,” that means you can eat food that has contacted its surface. For instance, cutting boards and wooden spoons are treated with a non-toxic sealer that improves their longevity. Things like linseed oil and wax have been popular for this purpose over many centuries.
In the past, lead was often used to aid the drying and hardening of certain oils. Any oil which dries to a hard finish is referred to as a “drying oil,” but the process can be very slow. To speed things up, they once used lead oxide, but this was highly toxic and was banned in 1976. Although lead-based dryers can still be used for certain things, they cannot be used for wood finishes.
Applying A Food Safe Finish On Wood Products
When applying a food-safe finish, it is important to follow the instructions on the container to the letter. The process will be a little bit different for each product, so don’t assume that the same approach will work for everything.
Here is a quick list of the most common food-safe wood finishes:
- Mineral oil
- Tung oil
- Walnut oil
- Coconut oil
- Linseed oil
- Shellac
- Beeswax
- Carnauba wax
Using An Oil-Based Product
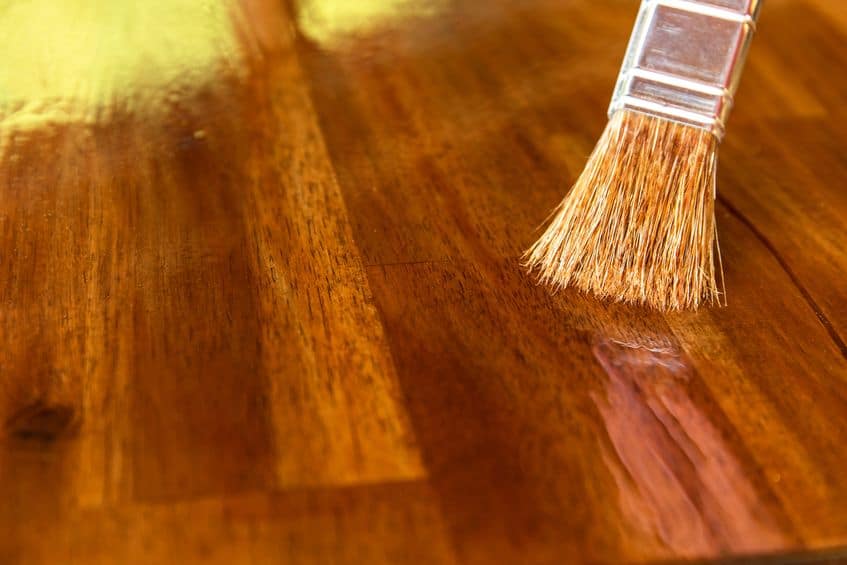
As you can see, most of these are oils. Oil-based finishes are more common than wax-based ones because they are far easier to apply. Not only that, but they soak deep into the wood and provide protection that a mere coating cannot match. Due to the porous nature of wood, people learned very early that it could soak up an oil and become waterproof.
First, you want to make sure that your wood surface is completely clean. Any paints, varnishes, waxes, etc. will interfere with the ability of the wood to absorb the oil. Re-oiling a wooden surface that has been oiled in the past is perfectly fine, and is, in fact, recommended. You may want to give the surface a light sanding before use as well, as this increases the glossiness of the final result.
From there, you just rub the oil into the surface and allow it to sit and cure. Curing time will vary by product, but oil-based finishes will often take 12-24 hours per coat. Some products contain non-toxic drying agents that are meant to speed up the process, but that introduces some suspicious additives into the mix. Between coats, it is essential to wipe off the excess oil or you will end up with a sticky, tacky surface that will never fully dry. When it’s all done, you should take a smooth cloth and give the surface a good polishing.
Using A Wax-Based Product
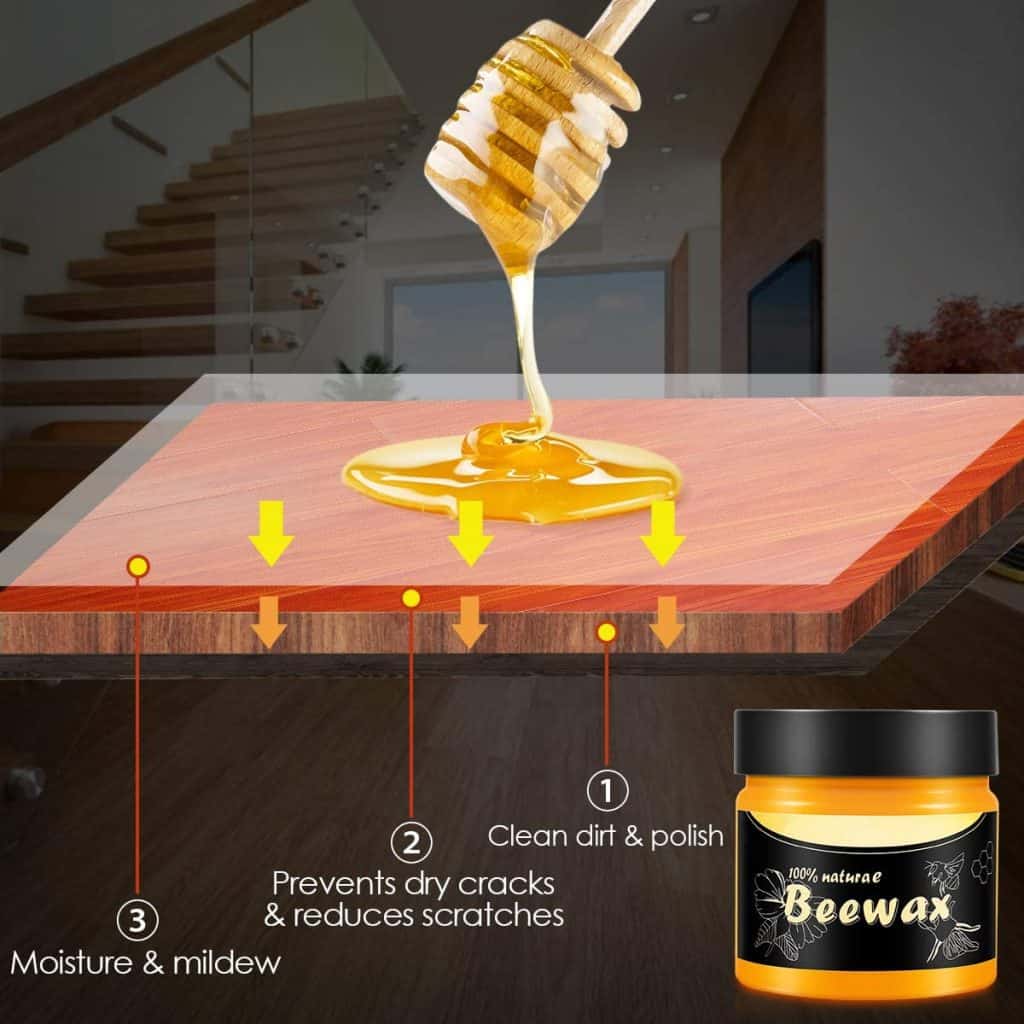
The use of beeswax is one of the oldest methods of finishing wood. When using pure wax, it must be melted before application. However, modern blends can be obtained as liquids, solids, or as a thick paste. When choosing one of these products, keep your eyes out for any ingredients that are toxic. Also, make sure that the product is labeled as “food safe.” If it doesn’t say that it’s food-safe, you should assume that it is not.
You should know that many waxes will contain solvents, but these are not usually a cause for concern. They are meant to evaporate as the wax dries, leaving little to nothing behind. You also need to watch out for anything that is paraffin-based. Paraffin, in case you don’t know, is derived from petroleum. You want only products that are made with natural beeswax for a proper finish
The use of wax couldn’t be more simple. You just wipe it on the surface of the wood, allow it to sit for a while, and then wipe it off. The longer you allow it to sit, the more deeply it will penetrate the wood. At the same time, it will also form a water-resistant top layer as it dries. Pure wax has to be reapplied quite often, and it’s not very durable, which is why it is seldom used today. If you should need to remove a wax finish, you can dissolve most of them with mineral oil or naphtha.
Using A Shellac-Based Product
This might surprise you, but shellac comes from an Asian species of bug. The female Lac bug, found in India and Thailand, secretes a hard, plastic-like substance. These are used to build tunnels and dwellings, and they can also be harvested for human use. They are usually sold as flakes of raw resin and then rendered into various consumer products.
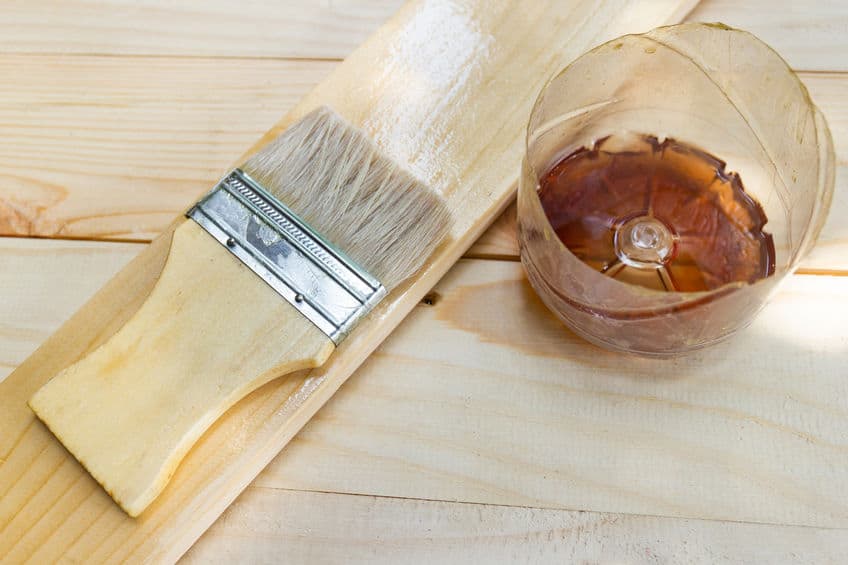
Because it is totally natural, shellac makes a great food-safe coating. The consistency varies a lot, so make sure to test your chosen product on a small piece of scrap wood first. When you know everything is fine, you just wipe the shellac onto the wooden surface with a cloth or brush.
Unlike oil or wax, it will not soak into the pores of the wood at all. Instead, it will form a hard and durable outer coating. Most people say it’s better to use the cloth for large areas and the brush for smaller areas. Even if it seems dry to the touch, make sure to wait 30 minutes to an hour between coats. After that, you just give the surface a light buffing and it’s ready to go.
Recommended Products
Here are three products that we might recommend for you:

This product is made from the flax plant’s seed, and it penetrates and preserves wood, giving it a high-quality finish for furniture and antiques.
Because it is pure linseed oil and contains no additives, it will dry slowly, up to 2-4 days, enabling oil to permeate deeply into the wood. Woodworkers appreciate linseed oil for its ability to resist water and provide a lustrous finish.
Bury in mind, given it is an organic oil, rancidification is a potential disadvantage. All organic oils suffer from rancidity produced by lipid hydrolysis and/or autoxidation of fats. However, linseed oil does not grow rancid as rapidly as other oils. This product should be applied on raw wood only; read the label carefully before use.
Natural Wood Seasoning Beeswax
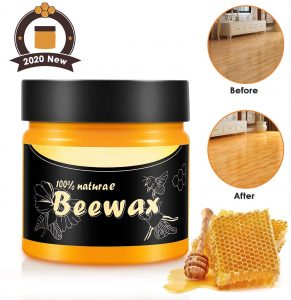
This one is a lot cheaper, and it seems to incorporate all the best advantages of a wax finish. This one has been rendered into a liquid, allowing it to be dabbed on with a cloth or wiped on with a brush.
The best thing about this product is the fact that it consists of pure beeswax with nothing else. If you want something that is unquestionably non-toxic, you can’t ask for better than this.
Want to see some real-life before and after shots, check this video by Homesteading Ways & Beyond:
Minwax 67500000 Tung Oil Finish

Tung oil works a lot like linseed oil, but it’s a little easier to use. For one thing, each coat will dry a lot quicker (5-10 minutes).
Thus, tung oil is a great choice for anyone who is in a hurry to get something done. It may not provide as much shine as some others, but it does provide a greater degree of durability.
A tung oil finish will generally last a lot longer than linseed or wax. A quick demonstration on how this product completely changes the look of old and tired wood can be seen here in this video by themrhelperguy:

Coconut Cutting Board Oil

Coconut oils have lately gained popularity for a number of uses, particularly in the beauty industry, due to their high content of saturated fats that are beneficial to skin health.
Unfortunately, all lipids exposed to air grow rancid over time, and coconut oil is no exception. A selection of coconut oils, on the other hand, is refined using a fractionation process, which means that the oils have been steam distilled.
Coconut oil is separated during this distillation process so that the long-chain triglycerides (LCT) are removed and only the medium-chain triglycerides (MCT) remain. In addition, coconut oil would work excellently mixed with wax for a soft, conditioning wood finish.
Clark’s cutting board oil is a plant-based oil that has no added preservatives or additives, and it deeply penetrates the wood. It works great with Butcher Blocks, Cutting Boards, Bamboo Cutting Boards, Salad Bowls, Wood Utensils, and Wood Countertops, working its way deep into the grain.
You should remember oiling cutting boards or butcher blocks every 3-4 weeks helps to keep wood from drying, splitting, and cracking.
COVID-19 Update: How To Disinfect Wood Products
FAQ
Here are a few of the most common questions that we receive on this subject:
In a word: Yes. Carnauba wax is derived from palm trees and is thus safe for food surfaces. Just make sure that it’s not mixed with anything toxic.
Yes, and there are many people who do this. You could just buy some raw flakes of shellac and mix them with denatured alcohol. Alternately, you could follow this recipe, which is based on a mixture of mineral oil and beeswax.
It depends on the nature of the wood, and upon how it will be used. For instance, a cutting board has to take repeated impact from sharp objects, so you would be better off with an oil finish. A filmy finish like wax or shellac will be more likely to crack or break.
Conclusion
We hope that you have enjoyed this article, but we also hope that you have learned some things. In the end, it all comes down to one simple principle: Be careful what you put in your mouth! If you follow this simple principle, along with the advice presented here, you and your family should be fine.
I have been gifted with a board that looks like it is intended to be used as a charcuterie board. It has a finish but I’m not sure if it is food safe. Should I assume that it is, or sand it down and reseal it with one of your suggested finishes? If so, would the new finish be enough to seal any of the previous finish that has soaked into the wood?
Hi Debbie. Unless the board has been finished with something that contains lead or zinc, which I doubt, personally I would be comfortable to use it.
The key is that any finish should be properly dry before use, and I don’t mean touch-dry. If you can smell the finish then it may still be giving off the various solvents used to manufacture it. If you’re concerned, or particularly sensitive, then go ahead and sand it back and re-treat it.
Shellac would be my pick in such a circumstance, as it goes over anything, is food safe, and forms a protective coating over the wood so preventing contact with any of the previous finish that may not have been removed by sanding. Here’s a good choice from Amazon: https://geni.us/fxg9p2V
BOILED LINSEED OIL IS NOT THE SAME AS RAW LINSEED OIL. PLEASE CHECK YOUR REFERENCES ABOUT THE SAFETY OF THE PRODUCT LISTED FOR SALE.
Hi Brian, thanks for the note this is an important clarification.
You’re right boiled linseed oil is not safe for food contact as described in this article.
Just in this article is an overview of the different types of materials without going into details. We will make sure to fix the information and change the example product to a Raw Linseed Oil one.
7 months on and this still lists boiled linseed oil. This may be an ‘overview’ but it is an overview of food-safe finishes so the fact that the first-listed product isn’t food-safe is hardly a mere detail.
Thx CFR for notifying us on this one, it’s a mistake that bypassed my content team.
The product is now replaced with the proper one and another alternative option of coconut oil is also added to the article, please let us know if you find any other issues with the info given in this article – it’s super important to us to improve and give you the best tips in your woodworking projects.
Thanks for fixing this.
Do you know why soap and water doesn’t remove COVID-19 from wood but does from hands? Is it the absorbency of the material?
Hello,
Interesting, can you point me to some reference material, I have not come across this information.
https://www.aarp.org/health/conditions-treatments/info-2021/coronavirus-surface-cleaning.html
Soap removes most of it. Probably enough, depending on how thoroughly you’re able to clean it. If some remains inside the wood, it seems unlikely enough could transfer to your hands to cause an infection unless someone’s immuno compromised.
Disinfectant kills it, thereby “removing” / killing nearly all of it.
Following this logic, maybe using a bit of sanitizer after washing hands would be safer if you have reason for concern that an infected person may have left bodily fluids behind.
Hi Brad, I’m not sure the absorbancy argument works, as it also persists on aluminum. To be frank, I’m not sure. Better safe than sorry, I say. Use sanitizer where you have concerns
Hi William, I have enjoyed your articles about sealers and epoxy. I have a piece of pecky cypress that measures 16wx32lx2d. I want to finish it and use it as a charcuterie board, so my finish needs to be food safe. The wood has multiple small holes on one half that extend through the depth of the board, that I would like to fill with clear epoxy. I am not clear as to the order in which I should approach this project. Do I sand, apply a polyacrylic (one application or more, or is this step even necessary?) fill just the holes with epoxy, dry, then cover entire board with epoxy? Or do I just sand and pour epoxy over entire board, filling holes (with tape on one side of the board) and top of board at the same time? Also how do I handle the edge of the board which is a live edge? If the epoxy only dries on a level surface, i.e. it will run with the edge of the board being an angle, how do I do that? I know its lots of questions, but after reading so much I am more confused than ever! Please help!! Thank you.
Hello Kathleen.
There are countless variants of wood finishes:
– how do you want it to look?
– what style to be?
– what will you use it for?
Therefore, the information is sometimes confusing.
You have to ask yourself what you want as a final result:
– whether to be high gloss?
– or to look natural?
– will only sausages be arranged or will they be cut on the board?
This will make the picture clearer.
In your case, it is certainly a good idea to sand first to see all the holes well. Then thoroughly clean the dust holes. Fill the holes with resin (note that, when dry, the resin shrinks slightly and another fine application may be required). Once the resin is dry, sand again until smooth, and then finer to a good smoothness.
From now on you can just smear with oil suitable for food, and so you will have a natural look of the tree.
Or pour resin if you want a more attractive and shiny finish.
Regarding the living edge, it is first good to remove the bark of the tree if it is there.
If you choose a natural look, just apply oil.
If you use resin and want to level the edge, the resin will adhere well, but it is good to have a layer of resin on the top of the board so that there is more strength.
Hello William,
Nice to come across you on line.
Not being experienced with wood, I made a mistake having a handy man use 2 coats of a sadolin wood protector – antique pine was the colour – on our large sunken in trampoline deck and I am really not happy with the colour. It ended up too dark. I am not sure how long it will take to fade but it takes up a big and visible space in our garden and rather than being patient for it to fade, I am wondering if there are options to strip the varnish off and what would the best options be? I can then choose a colour I like and revarnish.
On one of your blogs I read about a paint stripper ? I think it was called Defy Thank you
Hello Ariane.
Experience is the best teacher, it is expensive but it teaches well 🙂
When using a color coating, each subsequent application gives a darker tone. This is due to the semi-transparency of the coating.
If you want to make a thicker layer of the coating without changing the color, use a transparent coating that binds well to the stain.
Another trick to avoid unwanted results is to do a test on a tree that looks like the tree you are going to cultivate or on a small area that is not visible. You will lose some time for the test but you will be sure what you will get in the end.
You can use a detergent to remove paint and other coatings such as this one by Dumond, it will lift the surface layer of the coating that is currently being laid.
However, it will not remove what has soaked into the tree. For this purpose, it is necessary to sand until the wood lightens. This is usually hard work 🙁
Keep in mind that if you leave a color from the old coating, it will give a darker tone to the new one.
You can also use a paint stripper like this one.
Before applying the new coating, it is good to sand the wood with grid P150 and P220.