Wood stabilization hardens and protects wood to improve wear resistance and prevent timber degradation due to humidity and moisture. There are three primary reasons for stabilizing wood:
- You wish to stabilize and restore deteriorated or rotting wood in your house.
- You wish to use softwood in a role requiring durability, wear, and water resistance, such as making a knife handle, knife block, or pen blank.
- You desire a decorative effect incorporated in your finished object.
What Is Used To Stabilize Wood?
The process uses flexible, penetrating resin to penetrate the wood pores, incorporate the fibers, and harden the wood. The resin comprises a tiny molecule that fits nicely into the microscopic pores and capillaries of timber, bonding with and supporting the cellulose. The resin creates a linked plastic network throughout the timber structure.
Note that the resin will fill microscopic voids but not large cavities. You will need to fill larger voids in your timber in the same manner as usual before treatment. Stabilization makes the wood harder-wearing, returns a degree of strength to soft areas, and resists further fungal growth and rot.
Once stabilized, you can work the timber, as usual, using standard woodworking tools and techniques, although observing one or two precautions which we’ll discuss shortly.
Stabilizing Timber In Your House
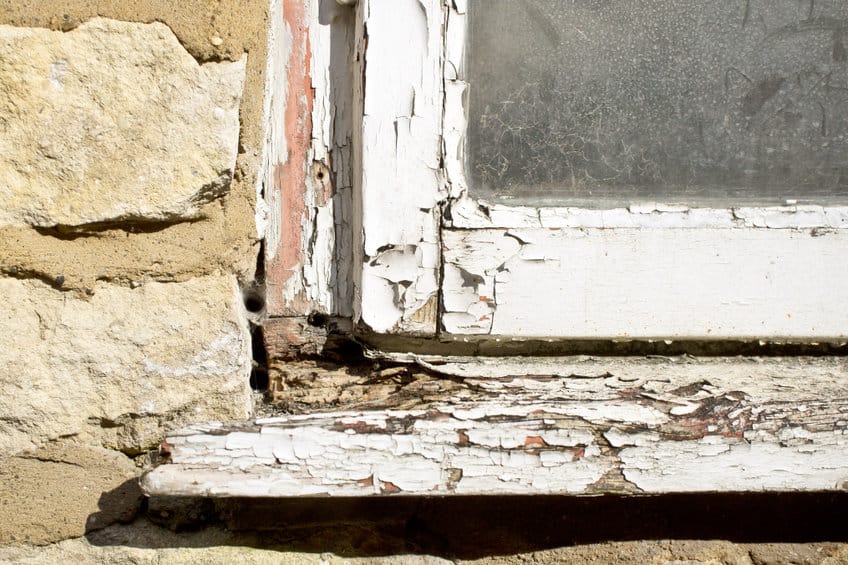
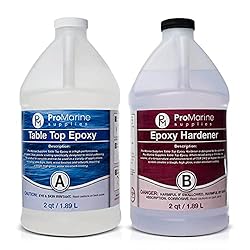
Let’s assume you have a windowsill that is going soft from some water ingress. To effect the repair, you’ll need a clear penetrating epoxy sealer applied using a brush.
You have two choices with resin selection, a single pot system and a two-pot epoxy. I’ve heard that the single pot is effectively resin in a solvent. I like the thought of a chemical reaction, so I always choose the two-pot systems. This product is an example.
As in all repairs, correctly preparing the surface is essential. You’ll need to clean the area to be treated and brush away any debris or rotten wood fibers. I’d then vacuum the area – you don’t need dust and debris in your resin. Then mix the epoxy per instructions and apply it to the area with a brush.
You’ll need multiple coats, as the wood will soak up the mixture. Allow the solvents from each coat to evaporate before applying the next coat. Depending on the size of the area, this process may take a couple of days. You’ll know when you’re done as the wood stops soaking up the epoxy and leaves a glossy sheen on the surface; at this point, the capillaries are saturated.
Allow the epoxy to harden off entirely and all solvents to evaporate. Once the surface is dry and hard, you can apply sealant, sand, paint, or varnish as you wish. Remember, however, you now have plastic in the timber, so keep feeds and speeds low to avoid heat build-up. If necessary, use a water spray from a bottle to keep the area cool during drilling and cutting.
Here are some links to a study published on woodrestoration.com into this process which will provide more technical information than you’ll ever need to know.
Written by a restoration specialist, a chemist, and a physicist, the document is a fascinating insight into the practical application of this system:
One last point: While epoxy will add some strength and support to timber, it is not designed to improve load-bearing characteristics. If you are treating a beam under load, I suggest seeking specialist engineering advice before proceeding.
Stabilizing Wood For A Small Project
I’m going to assume that we’re making a handle for something, so it will be a small blank of wood.

Part of the following process requires applying a vacuum to the timber, but don’t worry! You can buy what you need to do this or make your own for a budget solution.
This process differs from the previous architectural one, as it uses a two-pot resin system known as Methyl Methacrylate, known as MMA. However, unlike the two pot epoxies, we usually use in woodwork, the mixed MMA does not harden until exposed to heat. Once heated, the catalyst changes the chemical composition.
First, the moisture content of your wood blank must be at or below 10%. For those who don’t have a moisture meter, either place the blank in an oven overnight at 215 deg Fahrenheit, about 100 deg Celcius or use a food dehydrator. When you remove the wood from the oven or dehydrator, place it in a sealed bag such as a zip-lock to prevent it from absorbing moisture from the air.
Next, we need to submerge the blank in the mixed resin. Make sure the wood is cool, or it will immediately start to set the resin. Place the blank into the vacuum container and weigh it down to ensure it is completely covered with resin. In this process, the wood will only take up the resin it needs, and the remaining resin can be decanted and reused in the future, so don’t worry about waste.
Now we seal the container and apply the vacuum. Minus 25 inches of mercury (inHg) is sufficient. Leave the vacuum on until the resin stops foaming. This foam is the air releasing from the timber as bubbles.
Once the foaming has slowed dramatically or stops, you can release the vacuum. Vacuum release is the point that the wood begins sucking up the resin, so you must leave the wood in the resin for at least twice as long as you had it under vacuum. Give it plenty of time to be sure.
We need to cure the wood-impregnated resin with heat, which requires being placed in a 200 deg Fahrenheit, 95 degrees Celcius oven. Remove the wood from the resin and wrap it in aluminum foil. The key to this process is that the core of the wood must reach oven temperature for at least 10-minutes for the resin to set. Larger wood blanks require longer in the over, so leave for at least 2 hours. Longer times won’t hurt, but shorter times won’t set the resin. If the resin is still wet to touch, it needs longer.
Allow the wood to cool entirely before any cutting or machining work. Remember again that you are now working on wood and plastic, so keep the wood cool with slower feeds and utilize a water spray if necessary.
That’s it; you have now stabilized some timber! Note that more dense timbers do not stabilize as well due to their smaller pores, and particularly resinous woods can be troublesome. The only way to know is to experiment.
Decorative Effects
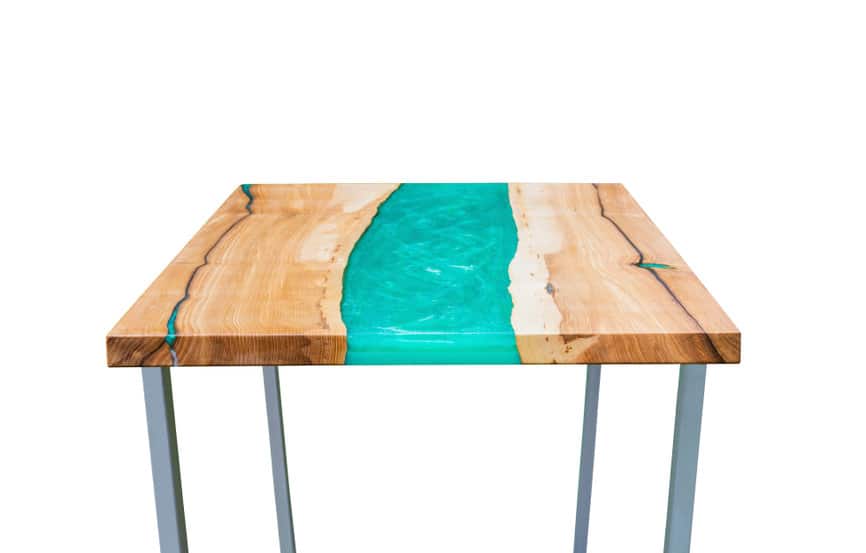
I’ve seen wavy-edged tables with resin inset into natural splits or purposely created voids. To add color, you can purchase alumilite dyes to add to the resin, and mixing colors provide a beautiful geode-like effect. The uses of this process are unlimited for a creative mind.
So good luck with your stabilization projects, and I’d love to hear how you fared and see your results.