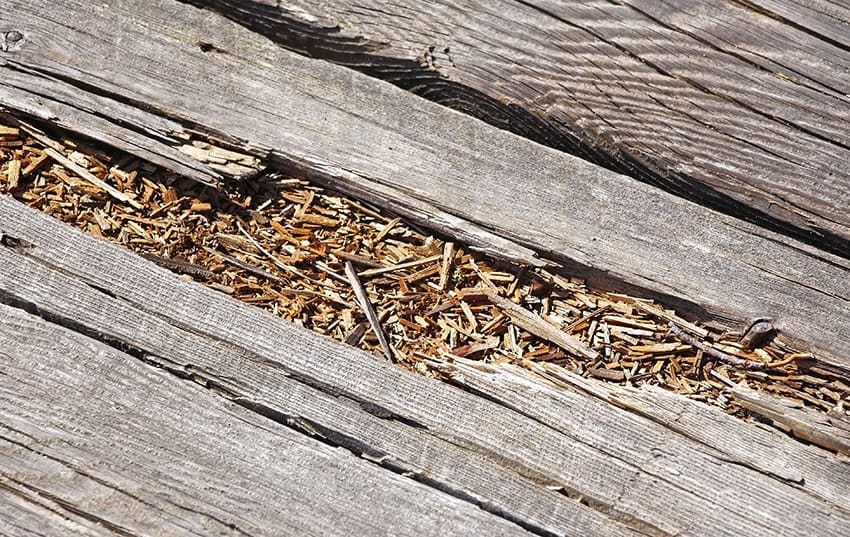
Wood rot is an inevitable fact of life. We make many things out of wood, and wood will always rot (sooner or later). Therefore, it’s a good idea to learn how to restore and fix wood that has been damaged by rot. While every project is different, this article should provide a general guide for the wood restoration process. You will, of course, have more than one option in most situations.
The First Decision: Remove Or Seal?
In order to restore rotting wood, you will usually need to remove the source of the rot. This means removing all the rotted wood with a claw hammer, a saw, a grinder, and/or some sandpaper. The rot is like a tumor, in the fact that you can only remove it by cutting it away. When you are dealing with rotted wood that has begun to crumble, you will have to remove the deadwood and replace it with some kind of filler.
Sealing Without Wood Removal
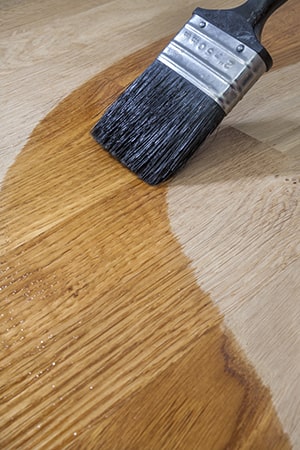
If the rot is not that bad, you might choose to seal it in. After sanding, a small amount of wood rot can give some interesting color patterns. Of course, this only works if you are talking about the early stages of wood rot, so this method isn’t always an option. If you choose to go this route, you just have to sand the surface thoroughly, until you get to the bare wood. I would recommend the use of a power sander or an angle grinder with a sanding wheel to save time.
After you have done this, treat the wood with a wood hardener and maybe a wood sealer as well. By doing this, you will kill the fungi that cause the rot. Wood rot, in general, is caused by fungi that literally eat the wood from the inside. Since fungi require water in order to survive, this sealing process will kill the rot at its source.
Filler Methods
In most cases, you will need to use a filler of some kind. Start by taking the claw end of a hammer and raking away any wood that is crumbling and brittle. Don’t hit it too hard, as you don’t want to damage any of the unrotted wood. After you have gouged out the worst of the problem, you will need to sand away the rest.
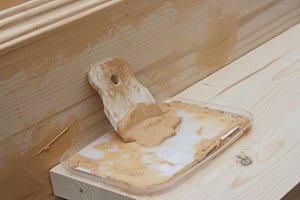
Method One: Wood Filler
One of the more popular methods of replacing rotted wood is the use of wood filler. Also known as wood putty, this stuff is normally made from a mixture of wood fibers and glue. It makes a great tool when restoring rotted wood, as it has a consistency that is similar to clay. As such, you can mold it into any shape that you might want.
Wood filler is also generally easy to sand, making it even easier to adapt this substance to any surface. There are harder wood fillers that you can buy, but most of them are not suitable for load-bearing pieces of wood.
Many commercial wood filler products also contain latex, so you should always check the label to see what you are getting. Latex is very strong (far stronger than most wood), and is completely resistant to moisture and most other natural degradation. It also has a certain springiness that allows it to resist impact better than any other filler.
If you want to do some experimentation, you can make improvised wood putty at home. You will simply need sawdust (a lot of it!) and some kind of glue. Of course, you can experiment with different types of glue, but the making of this substance is extremely simple. You just mix two ingredients, so it isn’t complicated. The only trick is getting the consistency that you need. I recommend using very little glue at first and then gradually adding more until the desired consistency is reached. Once you have gotten your mix right, you can start experimenting with different additives.
Method Two: Epoxy
Epoxy provides a very hard and tough solution for filling wood cavities. There are some epoxies that are almost as strong as steel (and a few that actually contain steel). It is also a very long-lasting repair and can be sanded and painted, much like putty. Epoxy also has the advantage of being very water-resistant.
Of course, there are some problems with this method as well. First of all, most people seem to agree that epoxy will be degraded by sunlight over time, which means you cannot use this for outdoor projects. Thankfully, there is a workaround for this problem. You can apply a UV-resistant primer and paint to the surface, and it should be fine. In most cases, you would probably want to paint the surface anyway, so this isn’t a huge problem. Epoxy is a little harder to use overall, and a little more expensive, but provides a pretty solid repair. Just remember that it needs to cure for at least 24 hours, or you will have a very difficult cleanup on your hands.
Method Three: Polyester Filler
Polyester wood fillers are another popular option. Most people seem to agree that this stuff is a little hard to use because it does not stick to the wood as well as some other fillers. Still, it is a very strong filler that can be used for more heavy-duty applications. It tends to dry very hard, making for a more durable surface. It is worth noting that polyester filler is often used on cars, and is more commonly known as Bondo.
Method Four: Wood Patching
This method is pretty straightforward. You remove all of the old wood and then use a small saw (or maybe a grinder) to cut the gap into a squared-off area. You then cut a fresh piece of wood to the correct size and affix it with glue and long wood screws. Make sure you don’t use wood screws that are extremely thick, or you might end up splitting the wood. Remember, you are probably drilling into a weak spot, so take care and go slowly. For strength, the most important thing is to make sure there are no gaps between the new wood and the old wood. Any gaps will compromise the strength of the repair, so make sure those cuts are nice and straight.
Preventing Wood Rot
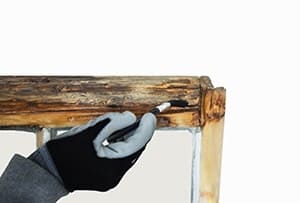
Before you do any repairs or restoration, you might want to consider the use of an anti-rot treatment. Although a thorough sealing will generally kill the fungi that cause rot, a borate wood treatment will make sure that the job is done. It will also act as a termite repellent. If you really want to make sure your wood has the longest life possible, this is a good thing to consider. It’s technically considered to be a pesticide, but it’s not a particularly toxic one.
For outdoor projects, there are two little tricks that can help to preserve your wood from rot. First, make sure that any nails or screws are countersunk and plugged with a filler. Otherwise, those small recesses will collect water. Anywhere water collects, rot infests. For this same reason, outdoor wood should always have a sloped surface that won’t collect water.
Conclusion
Restoring partially-rotted wood is usually worth the time. If you know what you are doing, it won’t even take that much time. Whether you choose to use a filler, a wood patch, or just a sealer, most rotted wood can and should be salvaged. I hope that I have given you a good idea as to the principles and methods by which this is done.
Restoring wood and preserving it from further damage is a much simpler process than most would expect, so I recommend it for any wooden item that has value. Of course, no one can afford to seal and preserve every single piece of wood that they own, but you can certainly prioritize the important things and preserve them for years to come.
Perfectly straightforward article thank you! I have an old farmhouse with the original wood windows from 1920. One of them is in a tough spot exposed to the elements. The outer sill has a bit of dry rot but I believe I can save it after reading this. Thank you so much!
You’re welcome Jenny – glad to have been of assistance. I’d love to hear about your experience once done!
Thank you for this information William! Very helpful. I’m restoring a picnic table with what looks to be wet or brown rot (located in wet climate–Portland OR.) and am wondering what sequence to remove rot and sand? Is it better to sand and then remove rot or remove rot then sand? Or do both in tandem until you’ve removed as much rot as you can? Thanks in advance!
Hi, Alex.
You have several options, and there is no one right way. If you want to save yourself the work of digging out the rot, you can stabilize the rotten wood with epoxy.
Please look at this article I wrote last year on exactly that topic: https://woodimprove.com/stabilizing-wood-basics-with-professional-tips/
You need to ensure the table and the area of rot are dried out, then brush away any debris and loose wood fibers before applying the epoxy. Once dry, it can be sanded and finished the same way as the rest of the table.
If you don’t wish to use stabilizing epoxy, I’d remove the rot first and then sand. Depending on the extent of the rot, once you’ve taken out the worst of the spongy wood, you can get the sandpaper into the area of rot and smooth it back to a good base again. If it’s too deep, you’ll probably want to fill it.
I hope that helps! Good luck.
Thank you William! The epoxy route sounds like the path of least resistance. The bench has some large divots where the rot was/is, would you recommend filling with wood filler on top of epoxy to improve stability? Or will the epoxy provide adequate stability to those areas? And this table will live outside, you’d recommend some kind of weather proofing varnish on top of epoxy correct?
Hi Alex. You’ll only need wood filler if the epoxy isn’t flush once dried and sanded. The epoxy will certainly provide stability to those areas; in fact, it’s stronger than the wood.
Since you’ve had rot previously, I’d definitely look to apply a varnish to the whole table. My preference would be a marine spar urethane as such coatings are designed for damp areas with high UV exposure. However, exterior polyurethanes will do the trick also.