Whether you’re repainting a piece of wooden furniture or painting a newly built item, wood that will be painted must be cleaned, sanded, and primed. Before beginning any project, make a comprehensive plan. It’s worthwhile to invest in quality products and tools.
Plan your wooden project
You need to decide which paint technique you want to use and what materials and tools are needed. The tools you select will be determined by the materials you choose. One of the most important choices involves whether to use water-based (latex) or oil-based products. Primer, paint, and sealant must be compatible. For example, an oil-based primer would be selected for an oil-based paint and sealant.
It’s important to understand how different products perform. For instance, shellac protects against stains the best but has a strong odor. Water-based primers may not protect against staining. The choice also depends on the kind of wood being painted. Once you’ve made your selections, be sure to read and follow the directions.
Be careful
These are chemicals and require special care. You must be vigilant and protect yourself, people nearby, and the area in which you are working. It’s best to complete a painting job (priming, painting, and sealing) as a single process. If that’s not possible, it’s not advisable to delay more than a week between priming and painting.
Clean the wood
Wood must be clean before primer can be applied. With fresh wood, it’s a simple matter of lightly sanding the wood to ensure a smooth surface. Before applying primer, repair any damage.
There are products that can repair cracks, dents, holes, and any other imperfections. If you’re repainting something, you’ll need to sand the wood or apply a solvent. Remember to remove any hardware. You can use painter’s tape to protect areas you don’t want to be painted.
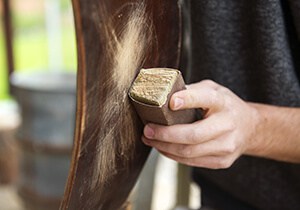
Sand the wood
It’s important to sand between steps to remove unwanted particles. If a piece requires heavy sanding or stripping, coarse sandpaper, with 40- to 60-grit, is needed. Sandpaper with 80- to 120-grit is good for surfaces with minor imperfections. Fine sandpaper, 360- to 600-grit, is used for sanding between coats and to provide the smooth surface necessary for applying primer, paint, and sealant. For the best results, each coat should be followed by sanding with fine sandpaper.
Prime the wood
Prime any wood surface you intend to paint. Primer helps to hide stains, knots, smoke damage, and more. Wood is porous, so it absorbs paint unevenly. Primer evens the wood grain, so the surface is smooth. Check the best wood primers so that you can choose the right one for you.
Another feature of primers is that they prevent bleeding through. Bleeding occurs when the tannins in the wood move to the surface. Tannins are acidic chemicals that are part of the liquid sap. They are responsible for the different hues in wood. These are an advantage when staining wood but can damage the paint.
If you’re repainting a piece of furniture, you should consider applying an undercoat instead of a primer. This will seal any remaining old paint, so the new paint will not be adversely affected. If you have made repairs, the primer will help hide these repairs. It’s not a good idea to leave a primed surface unpainted.
Paint the wood
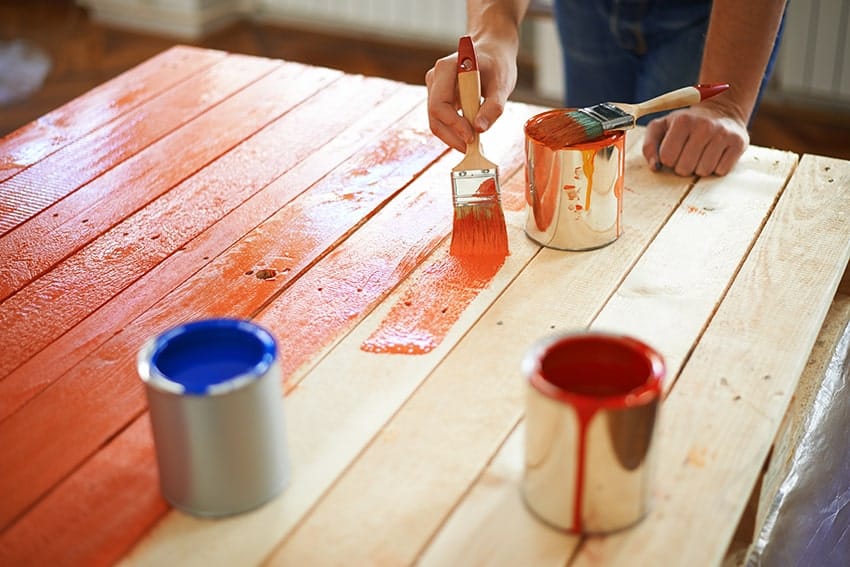
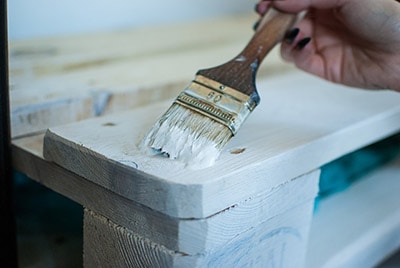
There is a technique to paint depending on the material being painted and the tools used. If you decide to use a brush, purchase a good quality brush, or it will shed bristles. Bristles that aren’t coarse are a better choice for furniture. Choose the best size and one that’s comfortable in your hand. It’s worthwhile to invest in smaller tools that will be easy to handle while painting. Undoubtedly, to get the best results you need the best paint for wood.
Painting with a brush
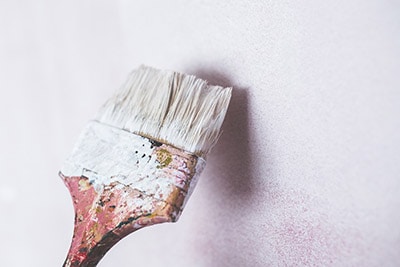
Don’t load too much paint on the brush. Brush with the grain, in complete strokes, from edge to edge, where possible. Brush in only one direction. Light strokes help eliminate the appearance of brush strokes, so don’t exert too much pressure. Two light coats of paint are better than trying to save time by applying one heavier coat.
When starting to paint with a dry brush, you can prepare it by running water over it. Use paint thinner if you’re using oil-based paint. This will make cleaning the brush easier. When cleaning a brush, remember to reshape it. It’s helpful to store the brushes by hanging them, bristles down when they’re not in use.
Painting with a roller
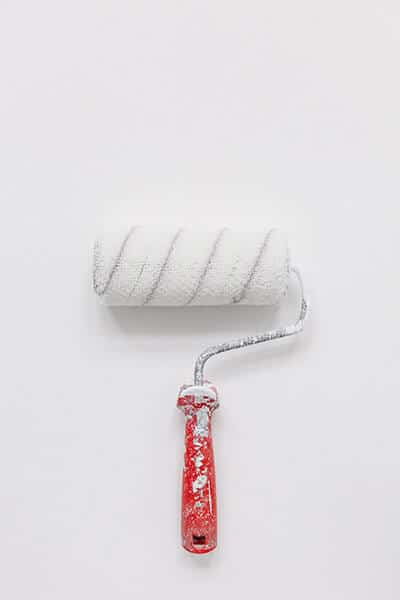
Another tool that can be used to apply paint is a roller. Smaller rollers are available for use when painting things like furniture. A cheap roller will cause problems. Invest in a roller covered in a good material like wool.
Any material will be shed. One way to avoid this is to cover the roller with masking tape. Pulling it off will remove most of the excess threads. A light touch will reduce visible roller marks. Don’t be tempted to use pressure to get the last paint off the roll. However, running a roller that’s almost dry, lightly across the surface, will reduce marks and help eliminate excess paint.
To save time, storing a brush or roller, properly, can allow you to skip cleaning every day. Placing the brushes and rollers in a sealed, plastic bag and putting the bags in the refrigerator will keep them moist. This is particularly useful when using oil-based paint because they’re more difficult and time-consuming to clean.
Painting with a spray
Spray painting is an alternative to using a brush or roller. Once you’ve developed the proper technique, it eliminates the appearance of brush strokes and roller marks. Proper ventilation is a good idea. It’s also easier to clean up.
An appropriate type of paint must be used. For example, paint that works on metal won’t work on wood. Exterior paint is a poor choice. For wooden furniture, a satin or semi-gloss finish is a better choice. Some level of gloss will make it easier to clean. Flat paint will show every mark and bit of dirt.
Avoid painting in an area with a fan or in direct sunlight, and stay away from heater vents. That kind of environment will cause the unused paint to thicken. You can use a spray bottle that will create a mist that can be used to control the moisture in the paint on the brush and in the pan.
Age your wood
There are many interesting finishes and ways to “age” a piece of furniture. Some of the more popular finishes include whitewash, stencil or raised stencil, aged copper, antique, antique silver, aged patina, faux verdigris, faux marble, or jeweled tones.
A search on these terms will yield a large variety of interesting ideas that will let you create a truly unique piece of furniture. Several coats of paint will improve the appearance. Make sure the paint is completely dry before applying a sealant.
Seal the wood
Time and use are not friendly toward the painted wood. However, there’s something that can be done to make sure the job will look great for years to come. The process is called sealing. The sealer is transparent and actually ‘seals’ the paint or bare wood making it smooth and nice. Also, it will let the topcoat (finish) stick to the sealed wooden surface more evenly. So the wood will continue to look beautiful.
Finish the wood
The last step is finishing your wooden project. The finish or topcoat is some kind of final covering that protects your wood. You may skip this step if your wood will not be undergoing some considerable exposures. Otherwise, let’s see what option you could choose.
Polyurethane
Polyurethane can be brushed or sprayed on. In addition to being used with paint, it can be used to achieve a finished look on bare wood. As an oil-based product, it has a powerful odor that requires it be used in a properly ventilated area. It presents a problem if a piece needs refinishing. You can’t strip it by using a solvent. Instead, it must be physically removed by sanding or scraping.
Waxes
Paste waxes aren’t brushed on. They are rubbed into the wood with a rag. Care must be taken to not leave extra wax on the surface. It becomes shiny when buffed. They can provide a unique finish because they’re available in colors. Because they’re soft, they don’t react well to warmth.
Furniture finished with wax shouldn’t be left in sunlight. It’s a good idea to reapply this kind of sealant as often as yearly. Interestingly enough, it can be used after the application of a polyurethane sealant for a warmer look.
Polycrylic
Polycrylic is water-based. Its low-VOC (volatile organic compounds) makes it useful in protecting children’s furniture. Don’t be concerned because this sealant looks whitish when wet. It becomes clear when it dries.
A special approach to finishing a piece, called decoupage, can be used to achieve an artistic look that can be used for small items like picture frames, awards, or jewelry boxes.
Sit back and enjoy your work
Once you’re finished with everything, the wood needs to have a chance to completely harden, and that takes time. It can take as long as a month. Doing this will make sure your work looks good a lot longer. If you’ve chosen an aged or distressed look, this is probably not a concern. Take the time to evaluate the experience. That will let you apply lessons learned to your next project.
Now, there’s just one more thing to do. Enjoy using your newly painted, beautiful piece of furniture.
Such an informative article! All the information provided by you is really very helpful. I agreed that we should use a tack cloth for removing small dust particles from the surface, It gives you perfect finishing. Thank you for sharing! Keep posting!
Glad you found the information useful, always happy to help. W
Hi William,
I’ve used a wood named kumbuk for my steps. A rare wood even in my island Srl Lanka, I want the wood to show as it looks brilliant .little uncertainty if the paint might spoil it for me . I’m told to use wallnut water base before using the sealer, but some say to go with only the sealer to have the wood to show well .
Seeking your opinion ..
Thank you ,
Hi, Zameel.
You see, paint will hide the natural grain of wood, so it doesn’t matter which kind of wood you have, it will be covered by paint. I agree that it’s better to use some transparent finish like sealer to protect it and yet save the natural look of your rare kumbuk wood.