Organic forms and curves in timber look highly sophisticated, yet you can create your own masterpiece with some surprisingly simple techniques. We’ll discuss three methods of bending wood that you can implement in your workshop using basic tools and jigs. I’ll also mention a couple of other less common methods, should you wish to experiment.
Kerf bending
The simplest of the three methods, kerf bending requires either a circular saw or a table saw. You’ll need glue, and depending on what you’re making, you may also need to make a jig around which to bend the wood.
First, let’s understand the name. A kerf refers to the groove or slit a cutting tool makes when it passes through a material, and the name indicates the method. We use multiple cuts that go partway through our timber, allowing us to apply pressure to the wood and form a curve. Here’s a graphic to help you understand what occurs.
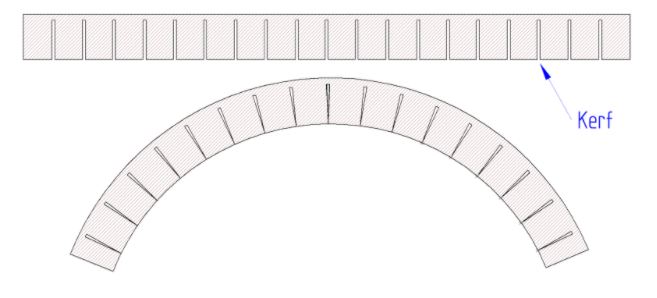
As you can see in the picture, kerf bending involves making a series of cuts across the face of a plank or sheet without cutting all the way through. That small thickness you don’t cut becomes thin and pliable, so when you apply pressure with your hands, the open end of the cut will close as shown. With each cut allowing a small bend, multiple cuts will create a curve.
Here are four important points:
- The more cuts you have, the smoother the curve
- Space all cuts the same distance apart
- The closer the cuts are together, the tighter the curve you can make
- Cut too deeply, and the bend loses rigidity
- If the cuts are too shallow, the curve won’t be smooth, and you may snap the wood
There is a mathematical calculation that you can make to work out how many cuts are needed, what distance apart, and to what depth to give you the smooth curve you wish. However, forget that and use an online calculator. These links take you to an imperial version and a metric version of the calculator.
Once you have the cuts and can bend it to the curve you need, straighten the timber and brush epoxy adhesive into the kerfs before rebending to the desired shape and restrain it with a strap or some clamps. Once dry, remove the clamping mechanism, and there’s your curve.
For an example of this process in action, here’s a video that takes you through from beginning to end:

Steam bending
Steam bending of timber is an age-old method of bending timber. Once a piece of wood has been heated up to the boiling point of water, above 99 degrees Celsius, or 210 degrees Fahrenheit, it becomes very pliable.
This flexibility is due to the makeup of wood, which is 50% cellulose fibers (what we use to make paper), and 30% lignin (a natural polymer that strengthens cell walls). The lignins soften when heated and moistened, allowing the cellulose to move in the structure when bending pressure is applied. When the lignin cools, it regains its strength and locks the cellulose in a new shape.
Best woods to use
Some wood steam bends better than others, with brittle or resinous timbers not accepting steam bending as well, while temperate-zone hardwoods are better than softwoods. You should get excellent results if you stick to oak, elm, hickory, ash, beech, birch, or cherry.
Note that green and air-dried timbers are better than kiln-dried. If you use kiln-dried timber, gentle bends are more successful, or soak the timber for a few days in water, having sealed the end-grain to prevent excessive water takeup.
Be sure to use straight-grained wood, as too much grain runout at the wood’s edge will cause splitting or breakage when bending. For the same reason, avoid knots or other surface irregularities.
Making a steam box
You need to create an enclosure to hold the piece of timber you wish to bend. Into this enclosure, you’ll pipe your steam to soften the wood. I’ve seen everything used, from thick plastic bags to pipes with caps on the end and purpose-built wooden steam boxes. As you’re all woodworkers, here’s a video to step you through one method of making a wooden steam box:

Note the steam source being used in the video? While you can get all fancy, the best steam source for a home workshop is a cheap wallpaper stripper that uses steam, as they’re inexpensive and more than adequate for the job. Plumb the outlet hose from the steamer into the steam box, and you’re good to go!
Steaming your wood
The rule of thumb when steaming wood for bending is to allow 1 hour per 1-inch of thickness. More time won’t hurt, while less time means you’re less likely to get a successful bend.
Some tips when you start the steaming and bending process:
- Wear gloves! That wood is at about the boiling point of water – you will need good gloves!
- If you’re using jigs or formers over which to bend the wood, have them ready.
- When the wood comes out of the steamer, work quickly! It starts cooling immediately, so you have no time to waste.
- When steam bending wood, you’ll find clamps are like workshop space; you never have enough! Have plenty to hand.
- The grain of the wood should run the length of the bend, not across it.
Clamp one end of the wood and start your bend. Use strong and steady pressure. It helps to have someone apply clamps as you go to keep the wood in contact with the former.
Once the wood is bent and restrained with clamps, you should leave it to cool for the same time as it was in the steamer. You can leave it overnight to be sure.
An important point to remember is the spring-back you get when you release the wood from the clamps. The wood will not remain at exactly the shape of the former you bent it over.
If the curve is important, overbend slightly. Don’t worry that you must be exact, as some plasticity remains in the wood to allow you to slightly unbend the wood if you’re adding it to an existing structure.
Here’s a great video from someone with 40-years of bending wood. He runs you through the failures you can get and then bends some wood on an industrial scale!

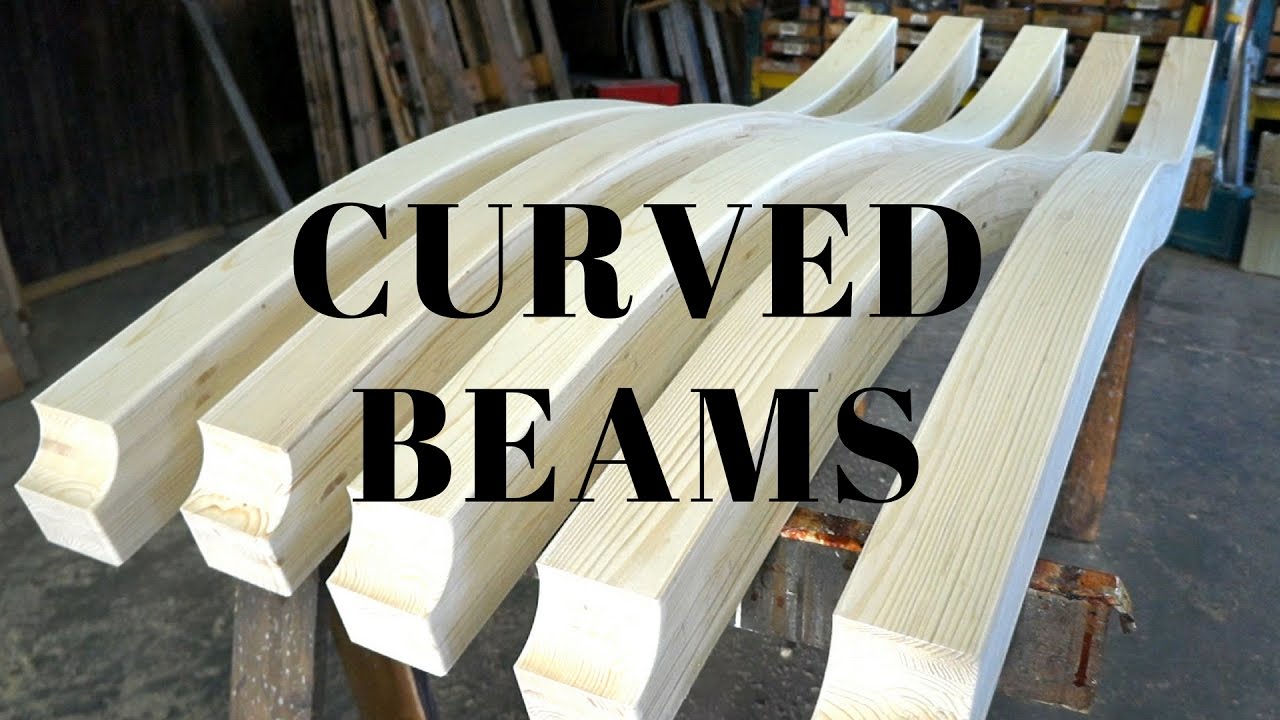
Laminating wood into curves
Laminating wood into curves is a simple concept. We cut a board into thin strips so that when they’re put back together with glue and bent around a former, they slide relative to one another and bend easily to the required shape. They’re clamped and the glue is left to dry, and upon release from the former, they hold the exact shape of the former. Springback is negligible to non-existent.
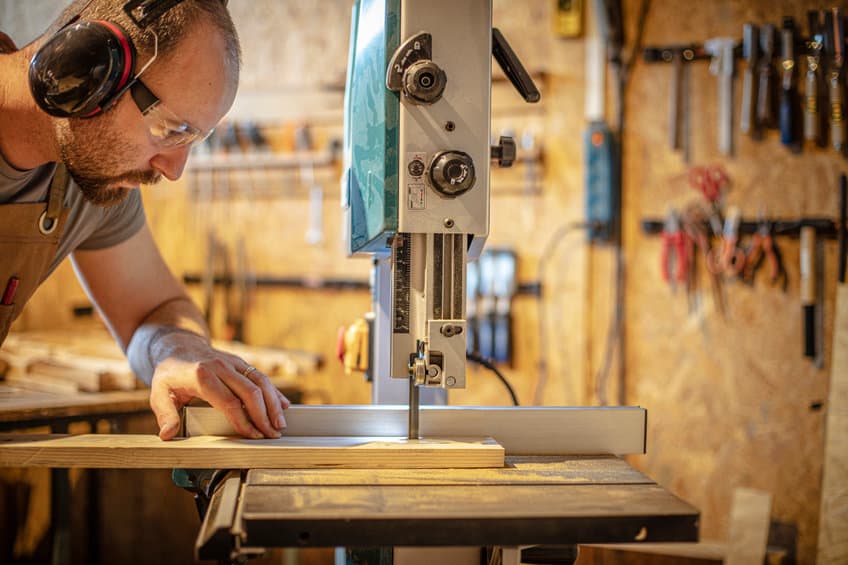
Use a table saw, or band saw to cut the strips. The thickness depends on the wood you’re using and its bending properties. A thickness between 1/8 to 3/16 of an inch usually works well. Use a sander or planer to ensure the faces are smooth and consistent.
I usually build my formers from plywood or medium-density fiberboard (MDF). Be sure the former is tall enough for the strips you’re going to bend. I stack the ply or MDF to get the height I need.
Don’t forget you’ll need to clamp the laminate bundle as it dries, so you’ll need lots of clamps. Use blocks between the clamp and the wood to avoid marking the surface.
I use ordinary old baking paper to go between the former, clamps, and laminates. The paper does stick to the wood, but better that than the laminates stick to the former! I then scrape it off with the excess glue once dry. I’ve also used a beeswax-based furniture spray rather than paper (avoid silicone-based sprays). Both methods work well.
As for the glue to use, I use a two-pot epoxy for my laminations, but ordinary wood glue works too. Just be aware that as you clamp, the laminations don’t move up or down. While they’re still wet, you can tap them gently to ensure they’re correctly seated.
Here’s a quick video to show you the basic concepts. These guys are making large beams, but the principles don’t change.
Two alternative methods of bending wood
This first method involves using ammonia mixed with water to provide a 75% water, 25% ammonia solution. The ammonia breaks down hydrogen bonds within the wood and the lignin cell walls, allowing molecular movement when subjected to tensile or compressive forces. Once the ammonia evaporates from the wood, new bonds are created, leaving a permanent set.
You soak the wood in the ammonia solution for 5 minutes per millimeter of wood thickness; you’ll need weights to keep it submerged. When removed, you can bend the wood for up to one hour, and you’ll need to restrain the wood in that shape until the ammonia evaporates.
Be aware this method does change the color of the wood, although it seems the process allows the wood to accept stain easily and assume an even finish.
Caution! I’m not a huge fan of this method, given it involves chemicals that can burn skin, eyes, and lungs. Please, if you do try this, use gloves, glasses, and preferably an apron to protect yourself from splashes. Be sure to do it in a very well-ventilated area.
The second method involves gluing two moist pieces of timber together, with their grains opposing each other. When moist timber dries and shrinks, it contracts the most perpendicularly to the grain direction. With the opposing forces, the two bits of wood bend into some interesting shapes upon drying.
Unless you have some particularly good computer programs to anticipate the profile you’ll end up with, this method is probably best for artistic forms rather than creating a planned structure. See the following video for details of how this method is being used: